How to Use ALSChat

ALSChat offers three ways to select letters, depending on how much movement the patient has. Pick the mode that fits today, and switch anytime from the ☰ menu.

1. Manual Mode

A caregiver sits facing the patient, watches which direction the patient's eyes point, and taps the matching group/letter. No camera is needed.

Illustration of a caregiver and patient sitting on opposite sides of a tablet, with a dotted line showing the patient's gaze pointing at the top-left letter group

The caregiver and patient sit facing each other with the screen between them. The caregiver watches where the patient's eyes point and taps that spot on the screen.
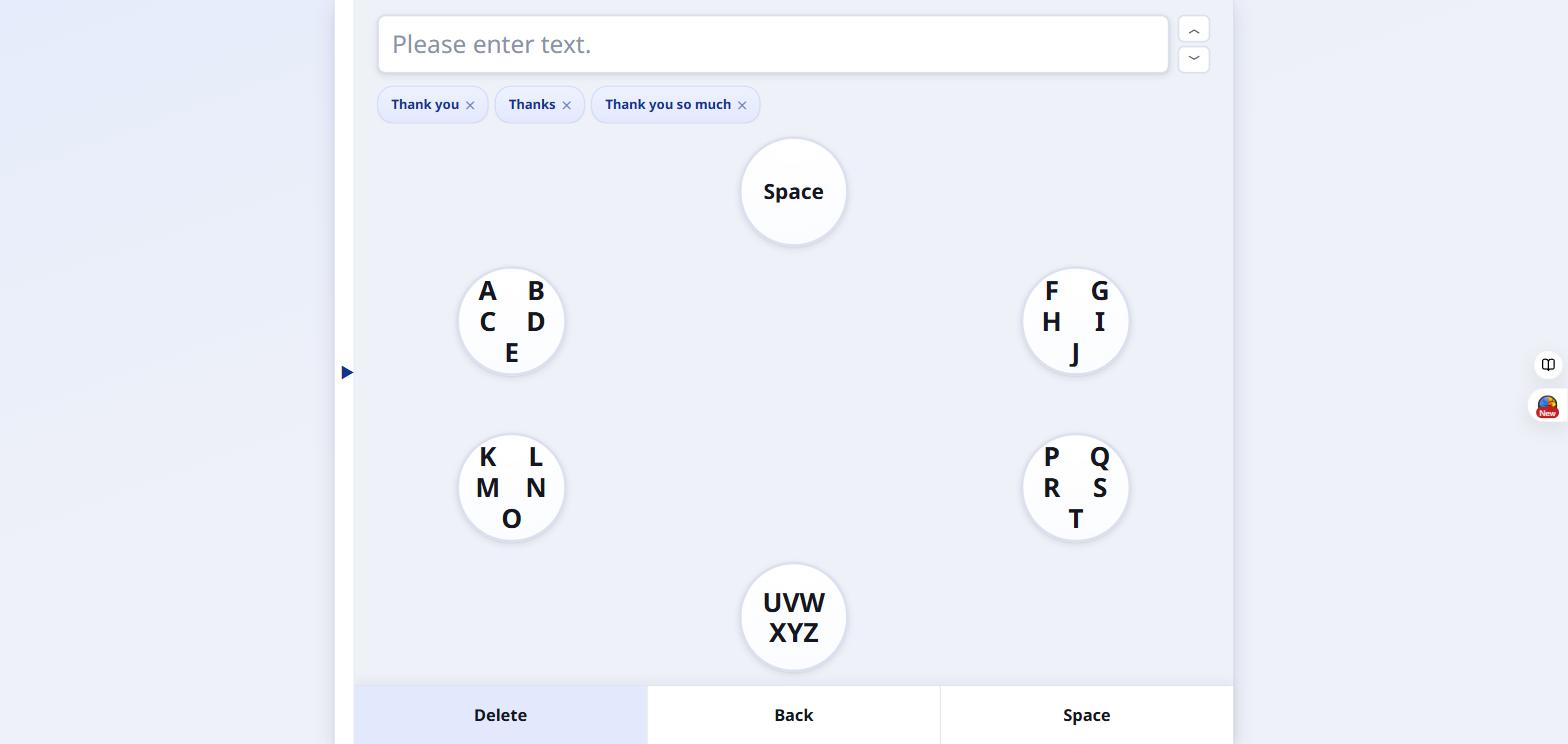
  1. Full manual-mode board with six letter groups arranged around the screen

    The screen is split into 6 groups arranged in a circle. The caregiver sits across from the patient and watches which group the patient's eyes point toward — e.g. the 10 o'clock group (top-left).
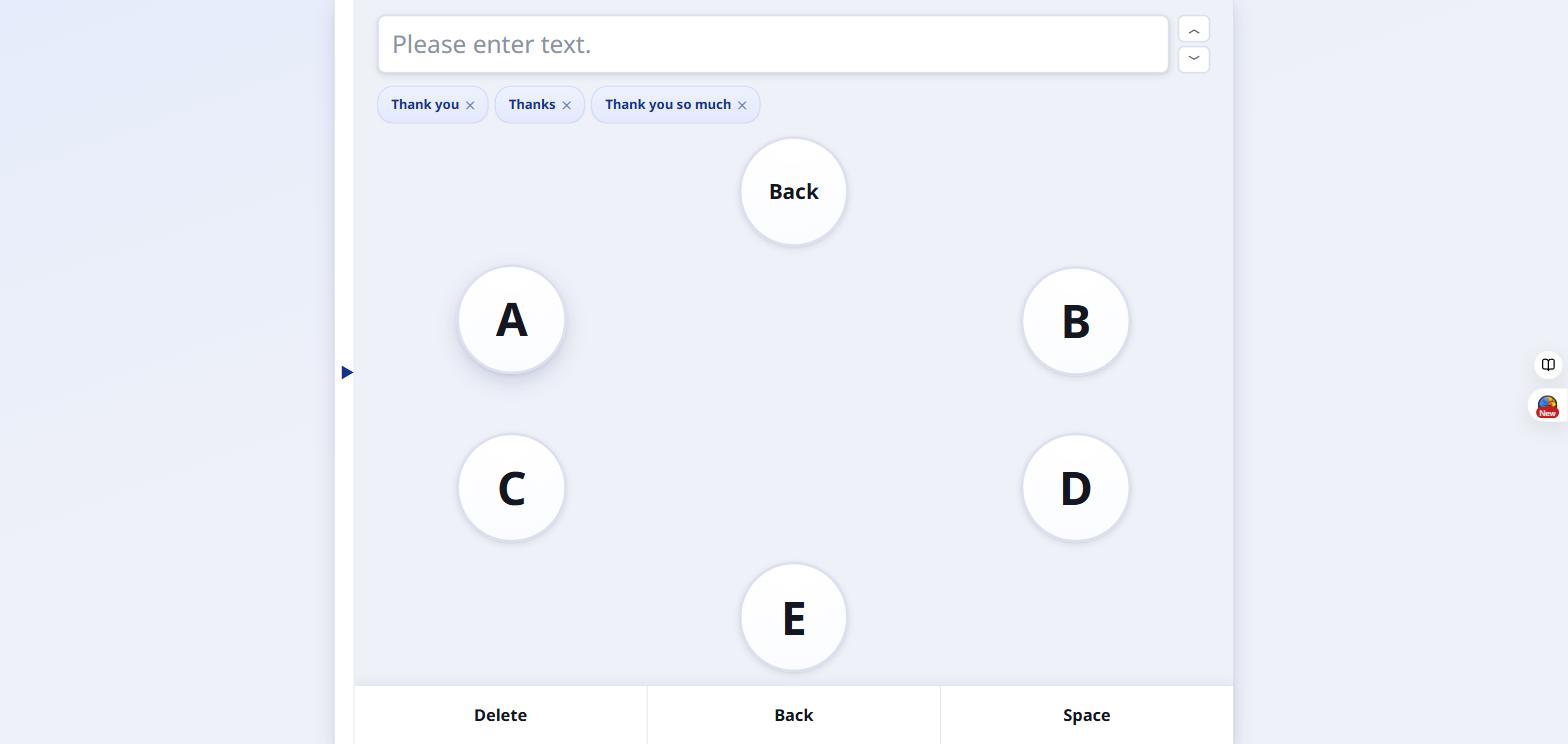
  2. Opened A B C D E group after tapping the 10 o'clock circle

    Once the caregiver taps that group, it opens into individual letters. The patient then looks at one letter — e.g. B at the 2 o'clock position — and the caregiver taps it.
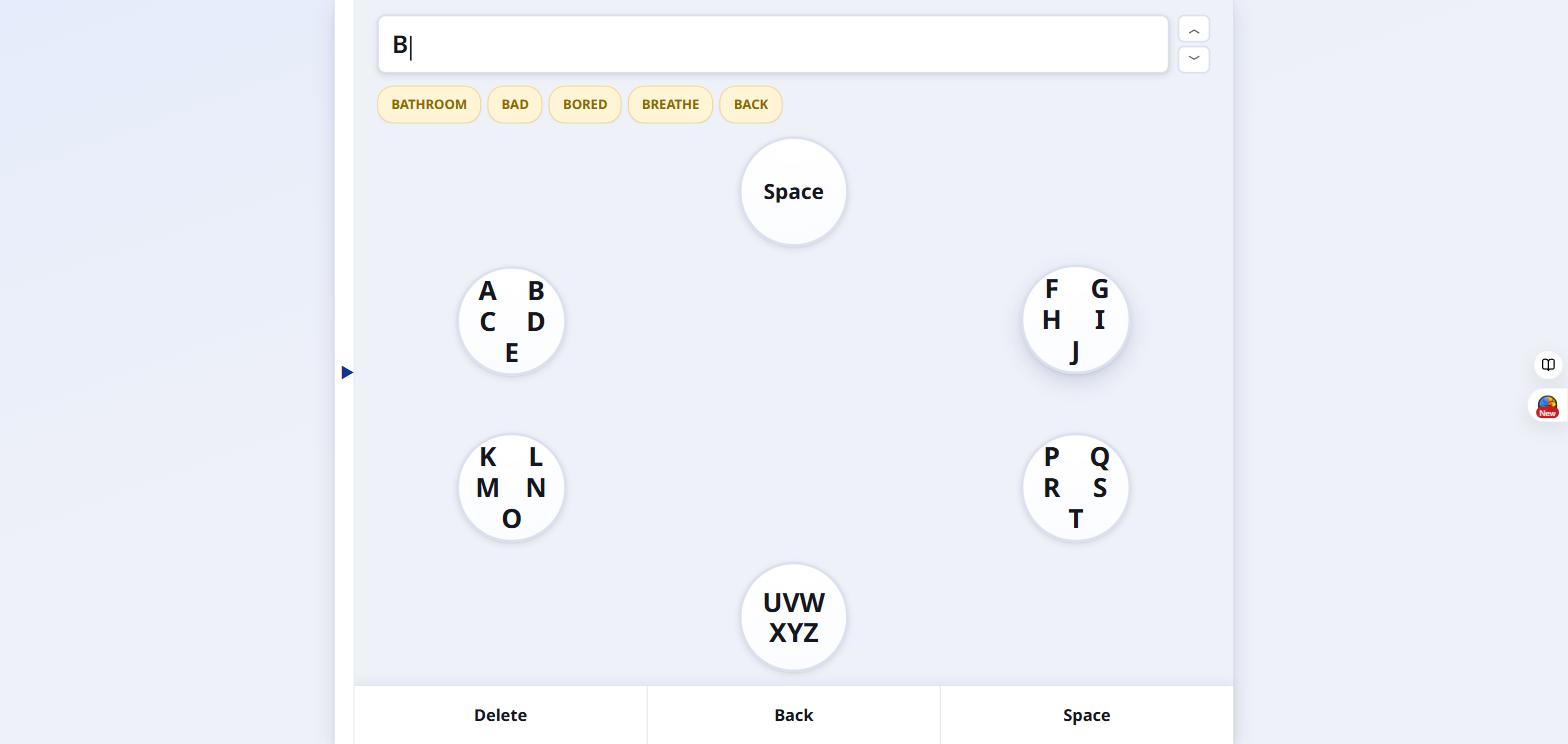
  3. Letter B entered in the text field with word-prediction chips shown

    The selected letter appears in the text box at the top, and word predictions show up right away — tapping one finishes the word or sentence.

😉 2. Semi-automatic Mode (blink scanning)

The patient can use this alone, without a caregiver right next to them — only a front-facing camera is required. Groups and letters highlight one at a time; the patient blinks for about half a second to confirm.
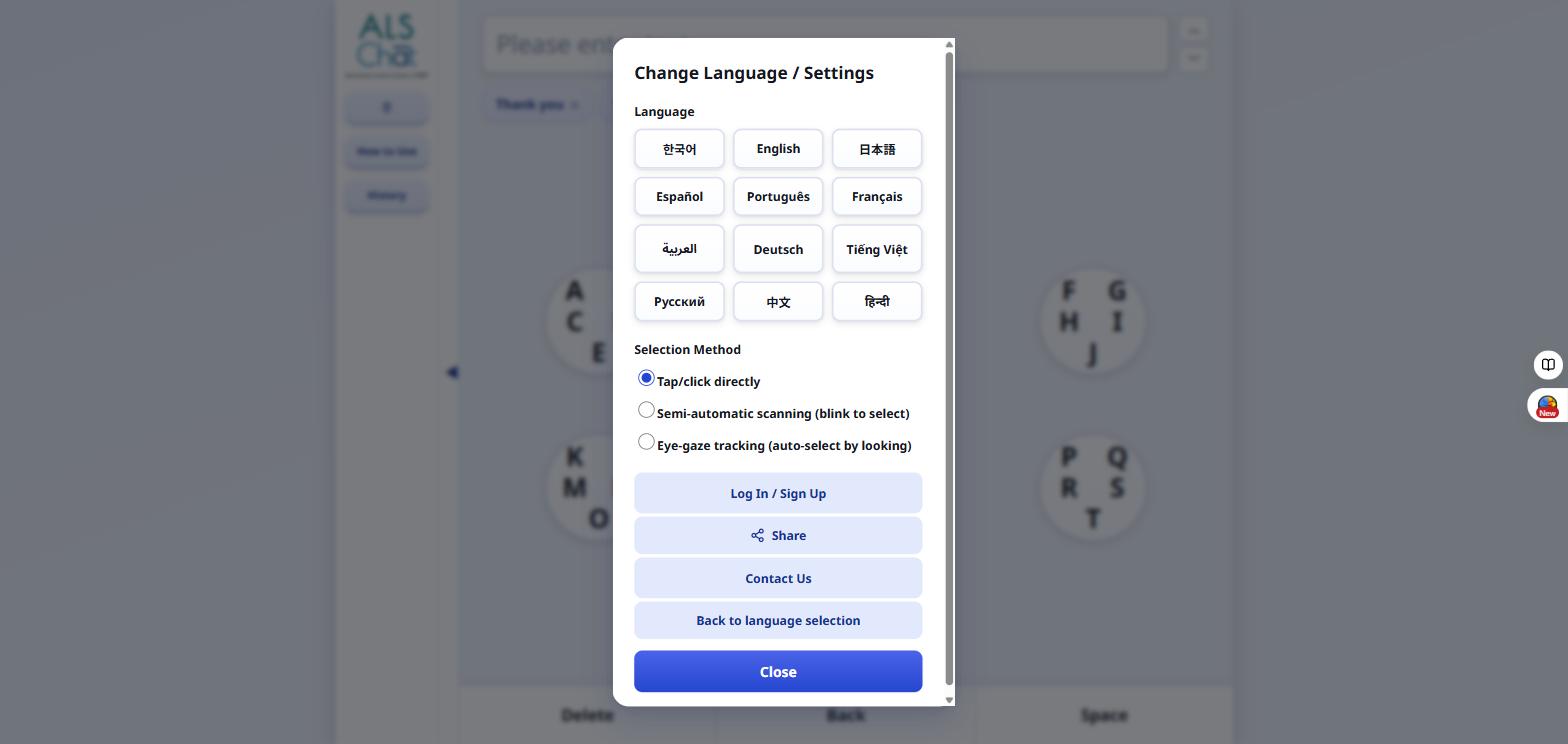
  1. Settings menu with Tap/click, Semi-automatic, and Eye-gaze radio options

    A caregiver opens the ☰ menu in the top-left and, under "Selection Method," chooses "Semi-automatic scanning (blink to select)."
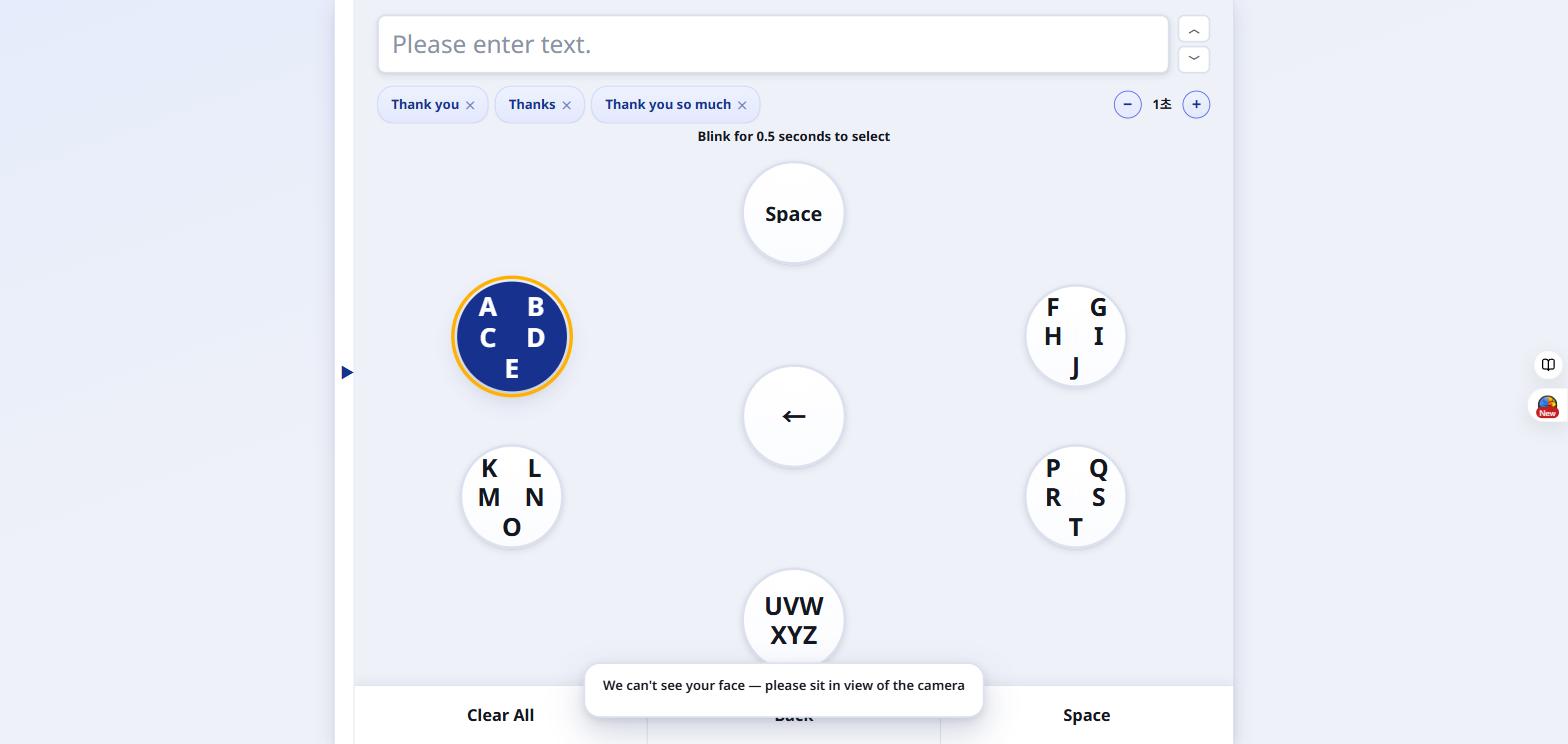
  2. Full-screen semi-automatic board with the top-left A-E group highlighted in blue

    The patient can now use the board alone in full screen. Each group is highlighted in turn, by default every 1 second — here the 10 o'clock A/B/C/D/E group is highlighted.
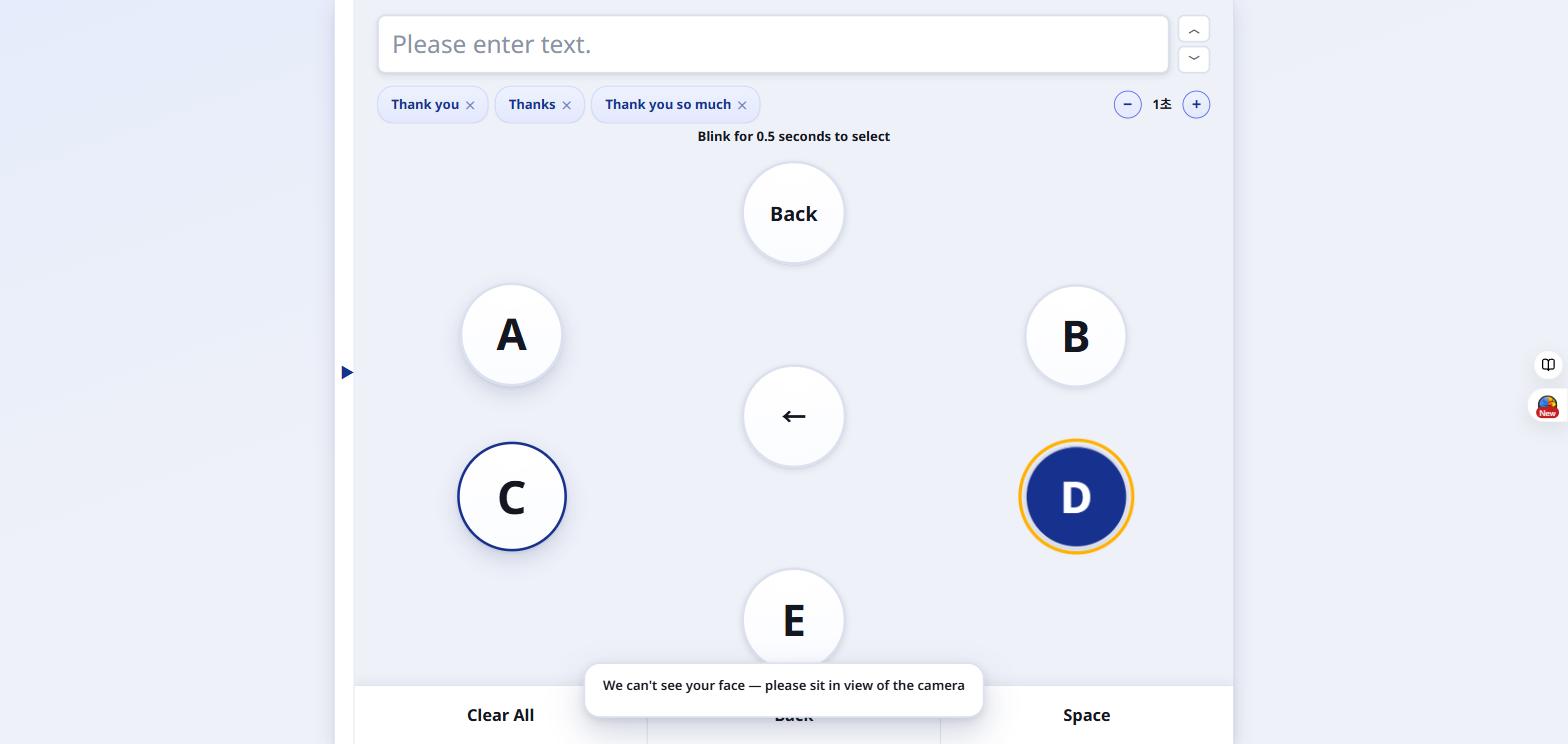
  3. Individual letters A through E highlighted one at a time inside the opened group

    Blinking for about half a second while a group is highlighted opens it, and the same scanning continues letter by letter. Blinking again while the target letter (e.g. D) is highlighted selects it.

  4. Suggested-word chips shown above the board

    The word-suggestion chips above the board scan the same way — blinking while a suggested word is highlighted completes the word or sentence instantly.
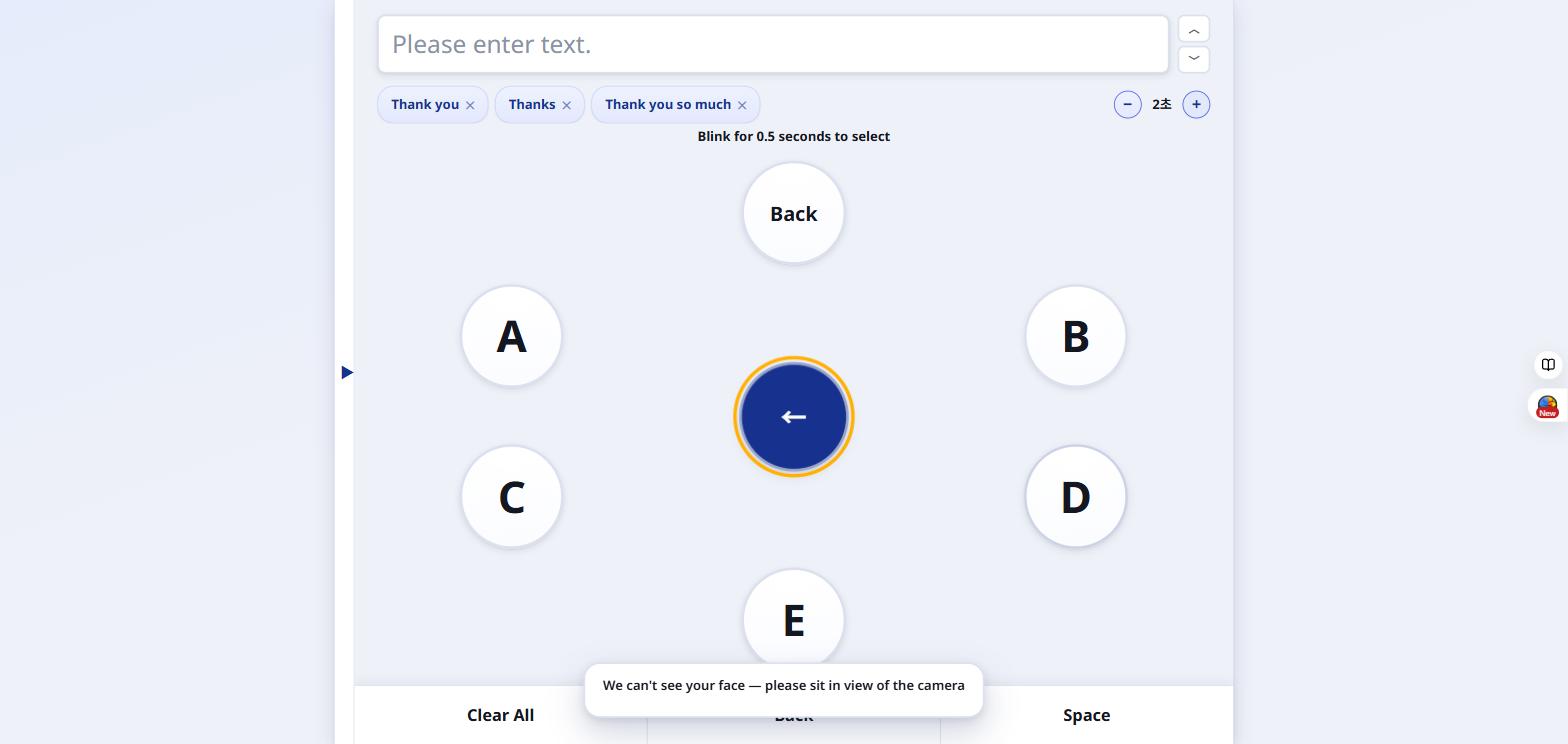
  5. Scan-interval control showing 2 seconds with plus/minus buttons

    The +/- control in the top-right adjusts the scan interval from 0.7 to 5 seconds — set it to match how quickly the patient can blink on purpose.

👁️ 3. Automatic Mode (eye-gaze tracking)

The device's camera follows the patient's eyes directly — no scanning wait, no caregiver needed once it's calibrated. Requires a front-facing camera (e.g. on a tablet mounted in front of the patient).

  1. Eye-gaze setup screen explaining the calibration process

    The first time automatic mode is used, a caregiver taps "Allow camera & start." The patient will be asked to look at 8 points around the screen, one at a time — this teaches the board what "looking at each spot" looks like for this person, in this seat, under this lighting.

  2. Calibration wheel filling in as the patient holds their gaze on one point

    While the patient holds their gaze on the highlighted point, the wedge fills up. Once it reaches 100%, calibration automatically moves to the next of the 8 points.

  3. Full automatic-mode board split into four zones: A-I, J-R, S-Z, and Backspace

    Once calibration finishes, the full board appears in four zones — A-I (left), J-R (right), S-Z (bottom), and Backspace (top). As the patient looks toward a zone, the letters there track their gaze in real time.

  4. Automatic-mode board with the on-screen "blink for 0.5 seconds" instruction visible

    Looking at a specific letter and then closing the eyes for about half a second confirms it — the letter is entered into the text box, exactly as the on-screen hint ("Blink for 0.5 seconds to select") describes.

  5. Menu showing the recalibration explanation and "calibration" button

    If the camera angle changes or the patient's head moves, tracking can drift out of alignment. Recalibrate anytime with the "calibration" shortcut in the top-right corner, or from the "calibration" option in the ☰ menu. In everyday use, if it starts to feel like "I looked at 9 o'clock but something else got picked" — that feeling is the cue to recalibrate.

Try it now

Open ALSChat and pick the mode that fits today — you can always change it later from the ☰ menu.

Open ALSChat